Lab 02 - Detection, Incident Response & SOAR
In Lab 01 you generated real security events - a blocked application, a blocked brute-force attempt - and watched FortiGate log them. Logs are only useful if something acts on them. In this lab you become that "something": you'll find the alert your own Lab 01 activity created, then build a small, safe automation that looks up the session behind it and shuts it down.
This is what a SOAR platform actually does - not "AI that defends your company," but a structured way to turn an analyst's judgment into a repeatable, auditable action.
Learning Objectives
After completing this lab you will be able to:
- Locate a specific alert in FortiSOAR among many students' events, using your own known IP as the filter.
- Explain why connectors abstract platform-specific APIs into reusable actions.
- Build a simple incident response workflow consisting of a trigger and ordered response steps.
- Use a connector action to enrich an alert with live SAP session data.
- Perform a scoped, reversible remediation action instead of a broad one.
- Explain which parts of this flow are safe to automate, and which still need a human to decide.
Lab Architecture
flowchart LR
    FGT["<b>Your FortiGate</b><br/>Lab 01 events: IPS block, App Control block"]
    FAZ["<b>FortiAnalyzer</b><br/>shared, already connected in Lab 00"]
    SOAR["<b>FortiSOAR</b><br/>shared, you log in with a shared account"]
    RFC["<b>SAP RFC Connector</b><br/>- look up session<br/>- end the session"]

    FGT --> FAZ --> SOAR
    SOAR -->|"you find YOUR alert,<br/>build a playbook that:"| RFC
FortiSOAR is shared across everyone, same as FortiAnalyzer and SAP - one instance, one login, everybody's alerts in the same place. That's deliberate: finding your own alert in a shared, noisy environment is itself part of what a real detection analyst does every day.
Log in and find your alert
Why this matters
Every student generated at least one FortiGate block event in Lab 01. All of those events flow into the same FortiAnalyzer, and FortiAnalyzer feeds the same FortiSOAR. Your alert is in there - so is everyone else's. The one thing that's uniquely yours is your Kali's source IP.
Steps
-
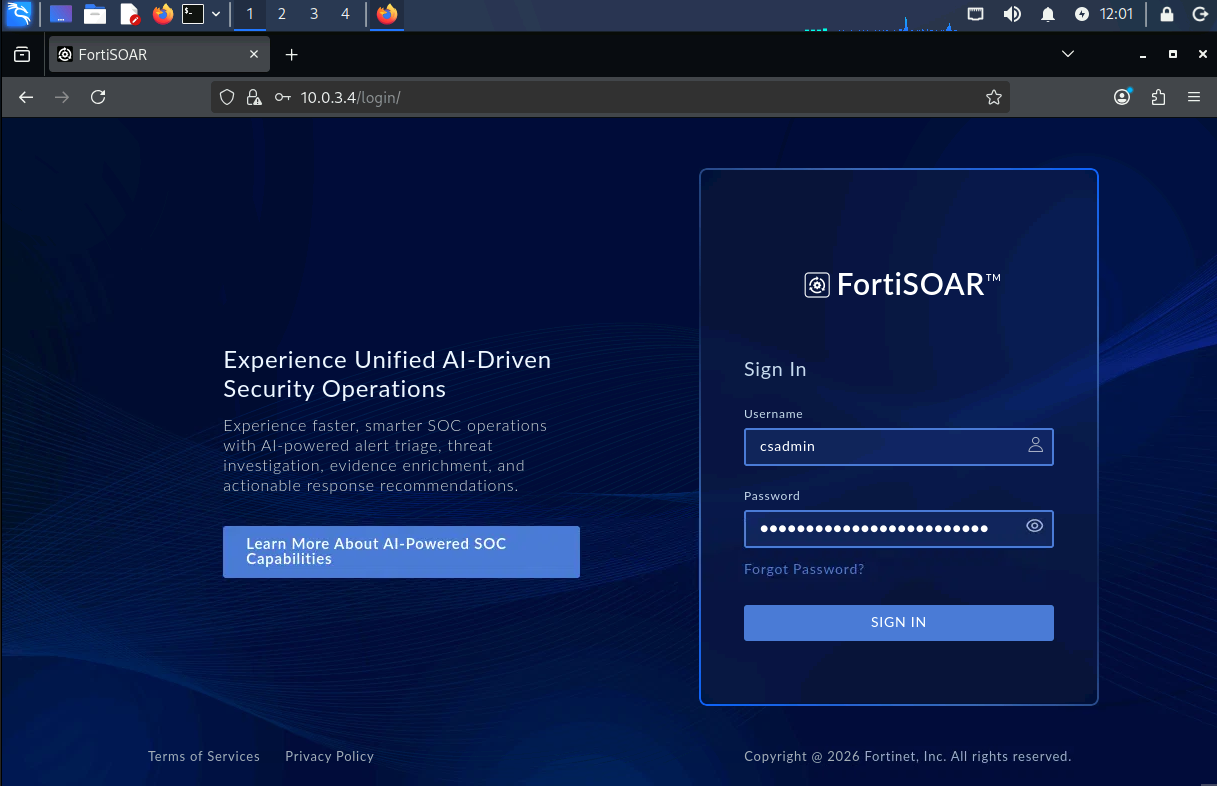
Open Firefox and browse to your FortiSOAR instance: https://10.0.3.4.
-
Log in with the shared student account using the credentials provided you in your credentials document.
- Navigate to the alerts view by selecting
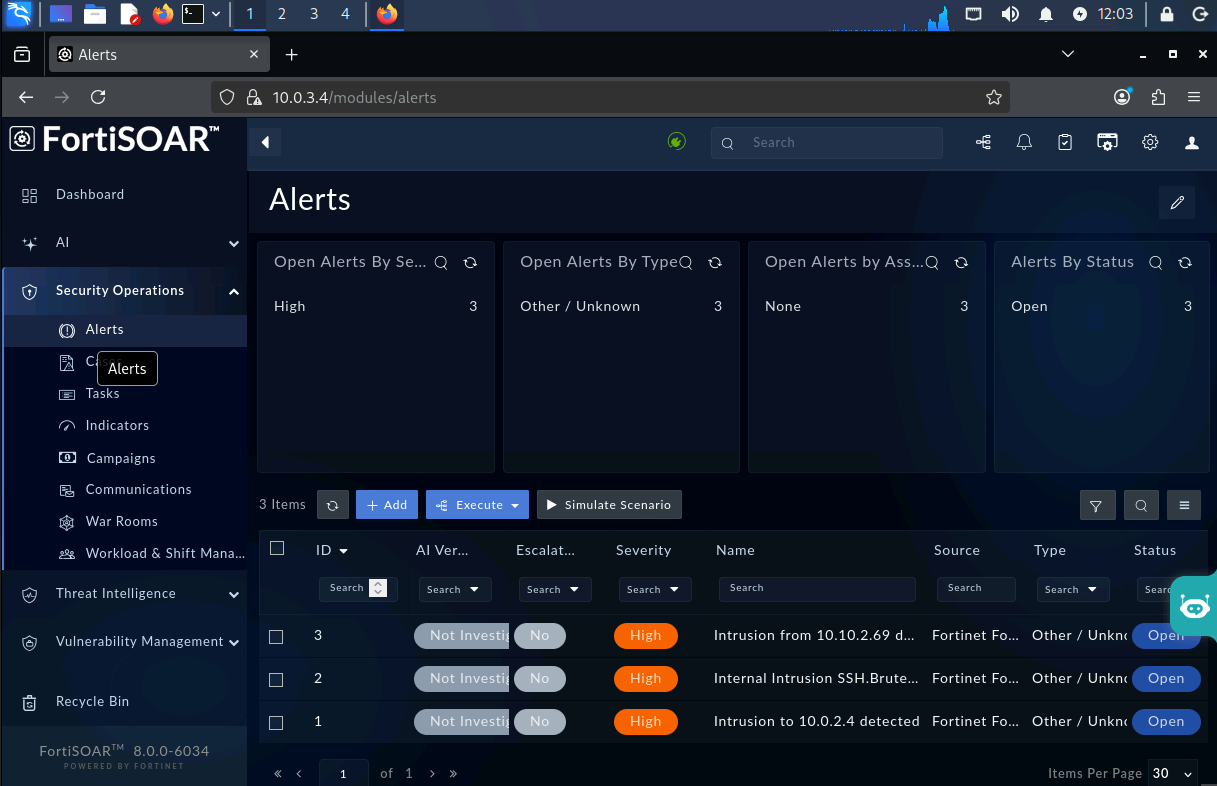
Security Operations-Alertson the menu on the left side.
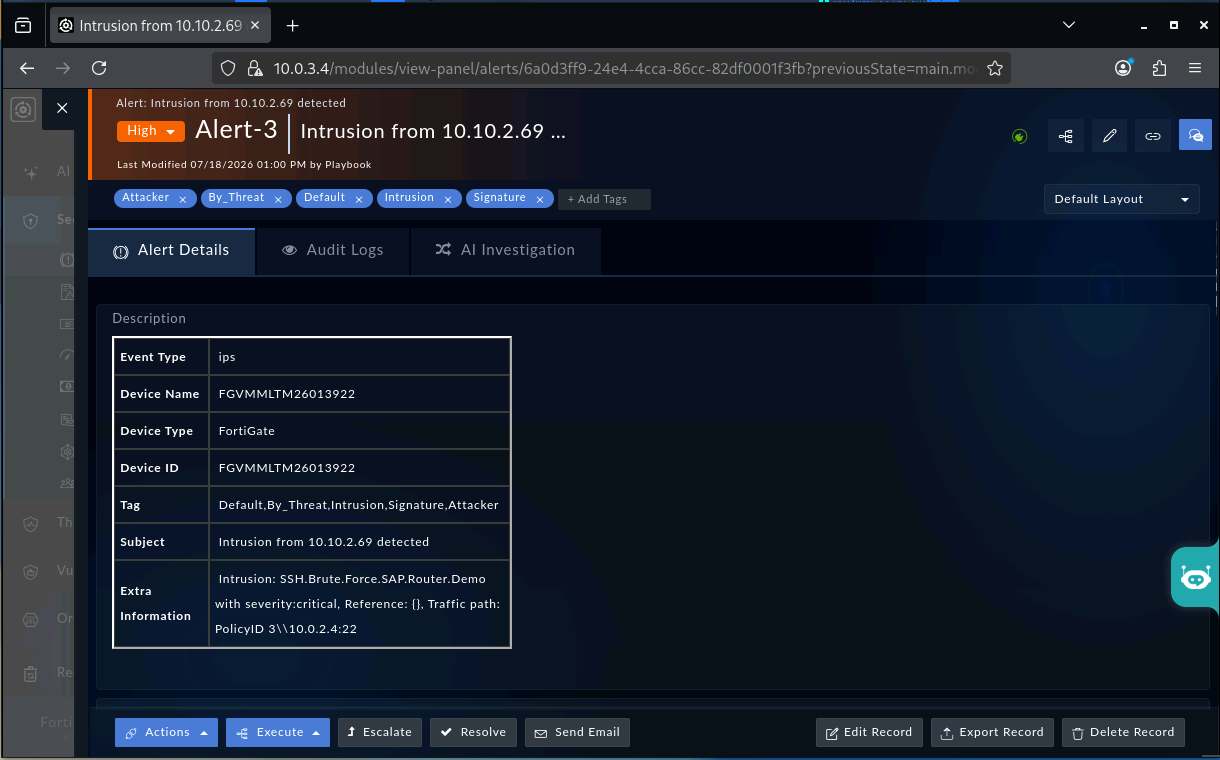
- Filter or search by your own SAProuter IP (
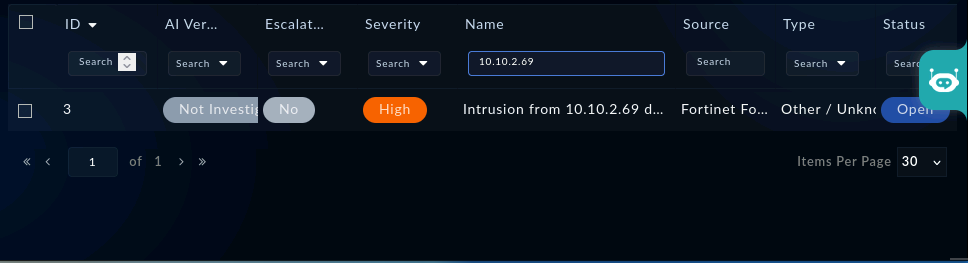
10.10.<N>.69, from your credential sheet) to isolate your event from everyone else's.
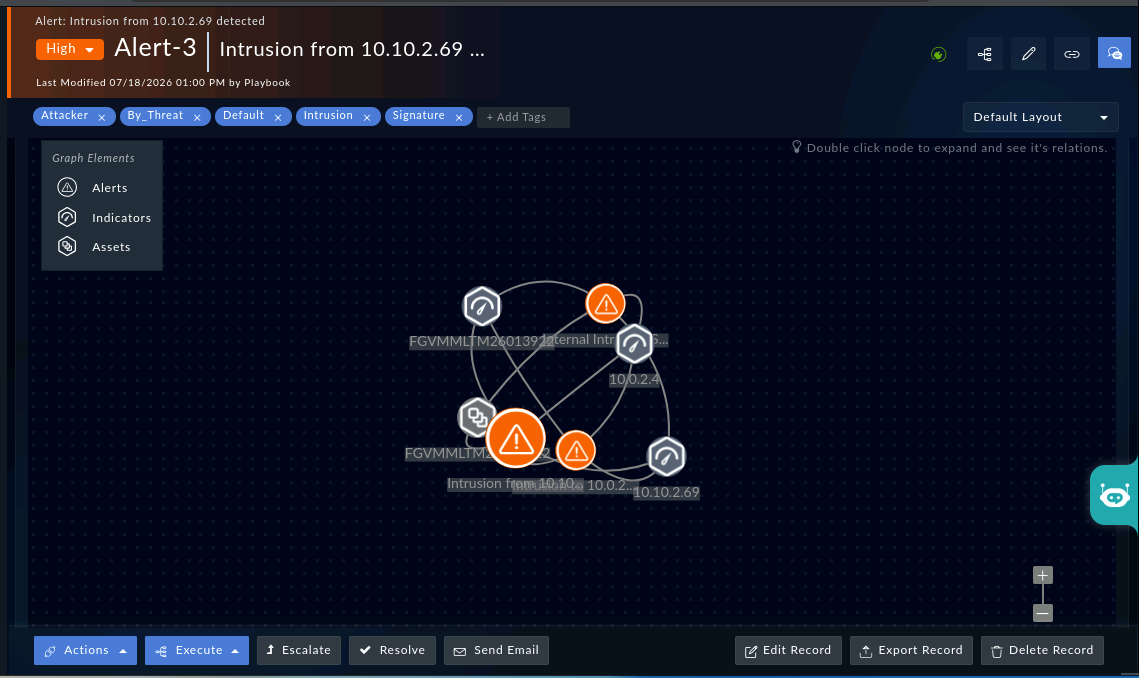
- Open the matching alert by clicking on it. Review the details and have a look at the graph which shows the correlation between different alerts, assets, etc
Understand the connector ecosystem
Why this matters
FortiSOAR does not implement SAP RFC communication itself. Instead it delegates SAP communication to a connector. A connector exposes a platform's capabilities as reusable actions (for example: 'Get Session List', 'Send Popup' or 'End User Session'). Think of a connector as a driver for a security platform: your playbook invokes a named action while the connector handles the underlying SAP RFC communication. Pre-built connectors are what make SOAR practical.
Steps
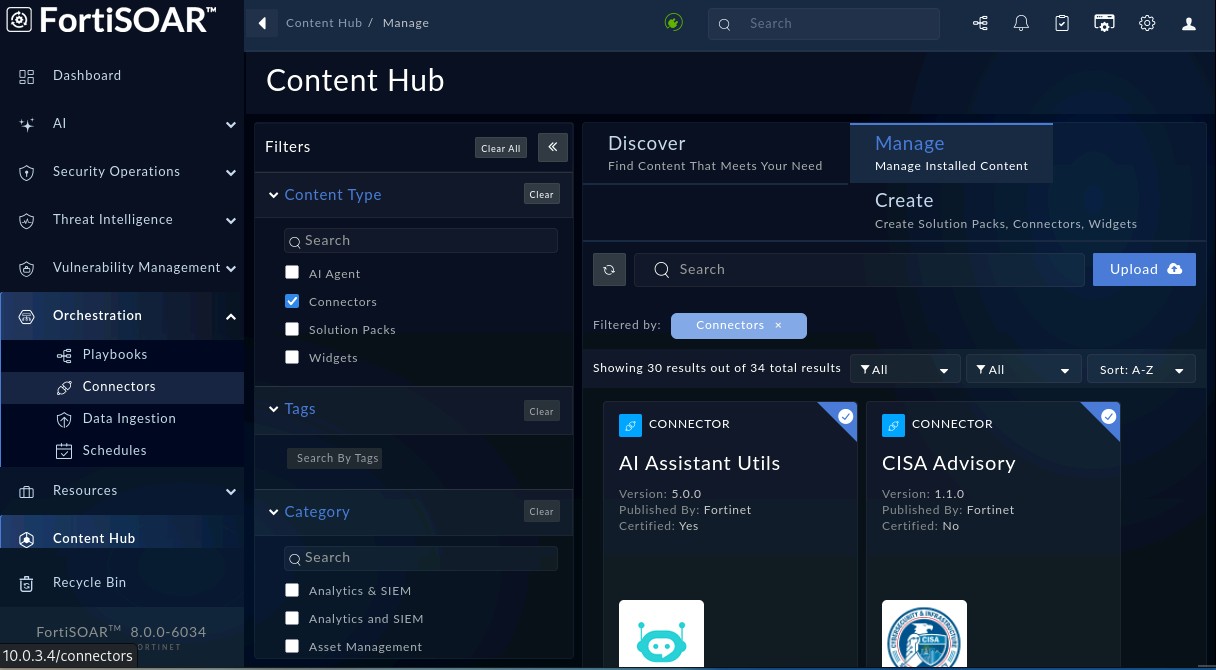
- In FortiSOAR, go to the Connectors page by selecting
Orchestration-Connectorson the side menu like in the previous chapter.
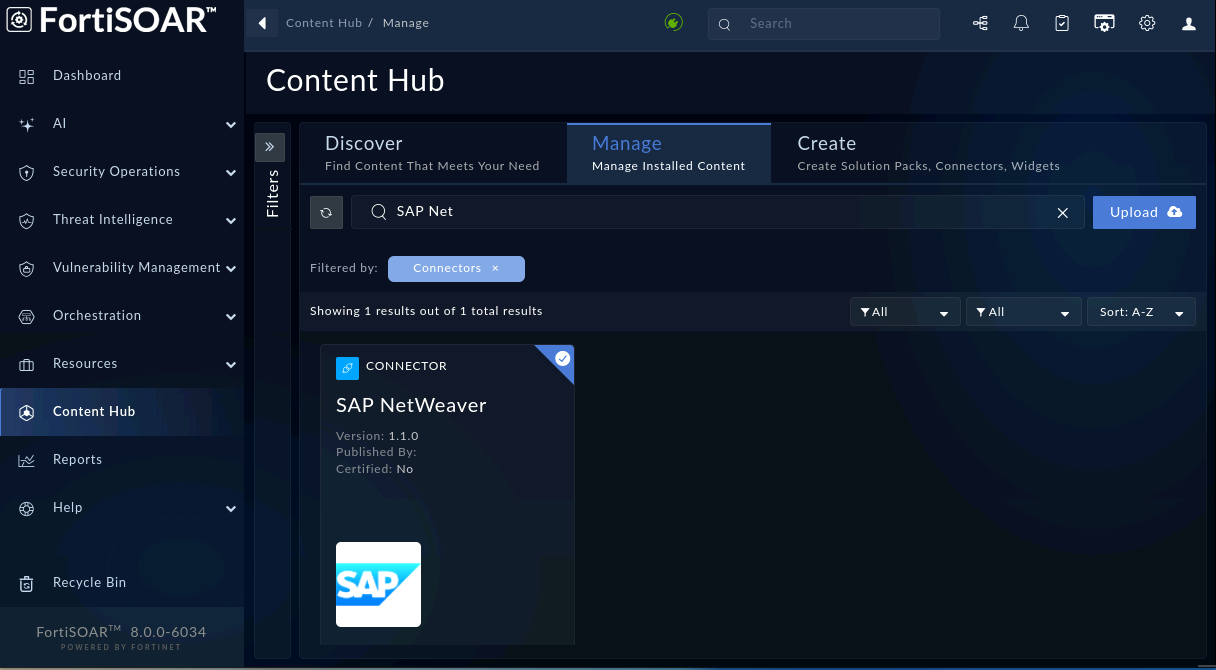
- Find the pre-configured SAP NetWeaver Connector - already set up and authenticated for you, same "everything's pre-built, you observe and trigger" pattern as Lab 01's FortiGate. Make sure you have selected the
Managetab.
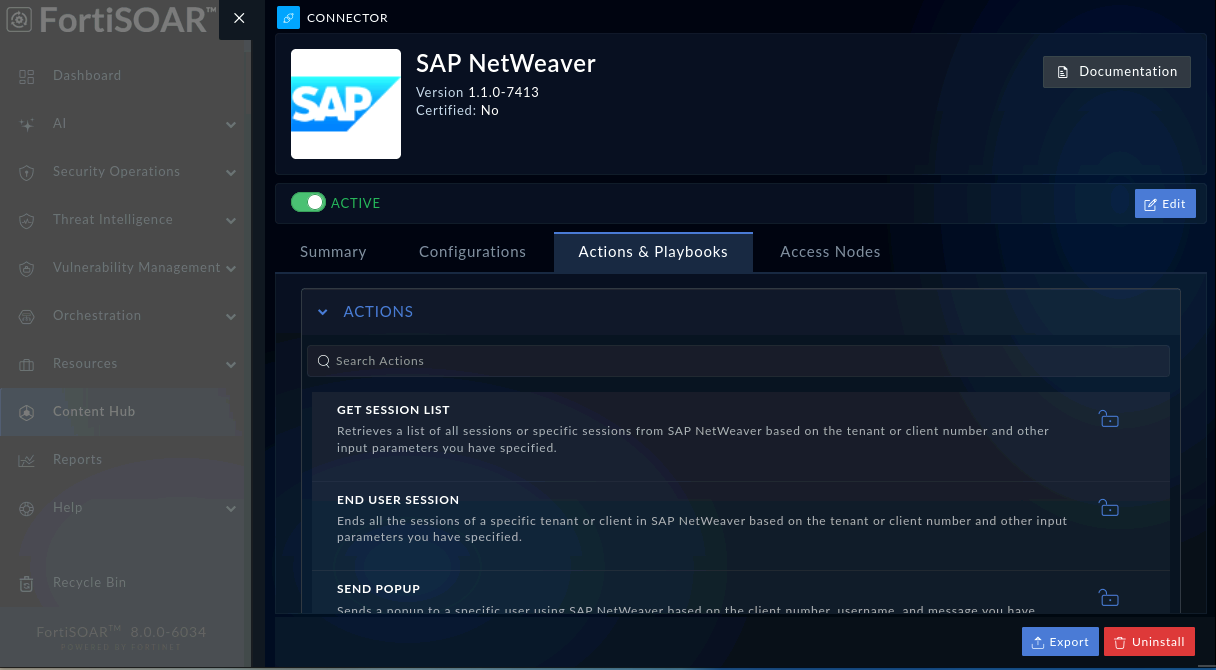
- Open it and look at the available
Actions & Playbooks. You should see something like a session lookup action and a session-termination action.
Build an Incident Response Playbook
Why this matters
A playbook is nothing more than a trigger plus an ordered sequence of steps - the same mental model as any automation tool, just applied to a security response. Building one yourself (not just watching a pre-built one run) is what makes the mechanics stick: trigger → enrich → act, with a human deciding when it fires.
Because everyone is building in the same shared FortiSOAR instance, your playbook needs a name only you would use - otherwise 20 students collide on the same playbook name.
Steps
- In FortiSOAR, go to the Connectors page by selecting
Orchestration-Playbookson the side menu like in the previous chapter.
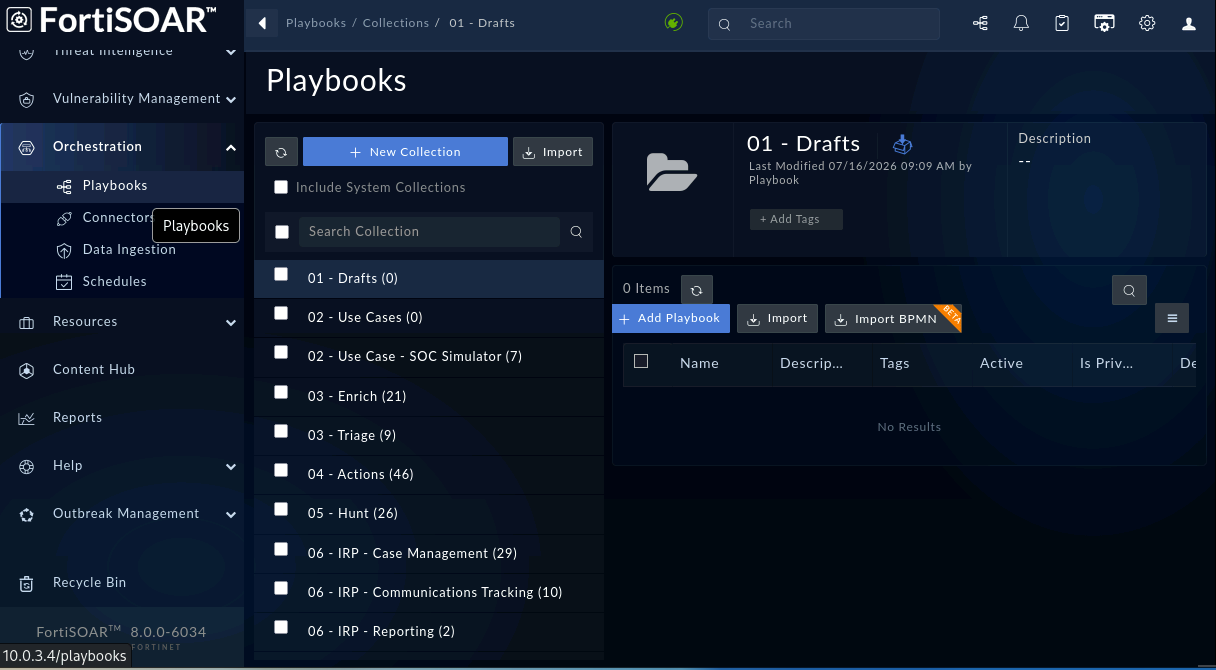
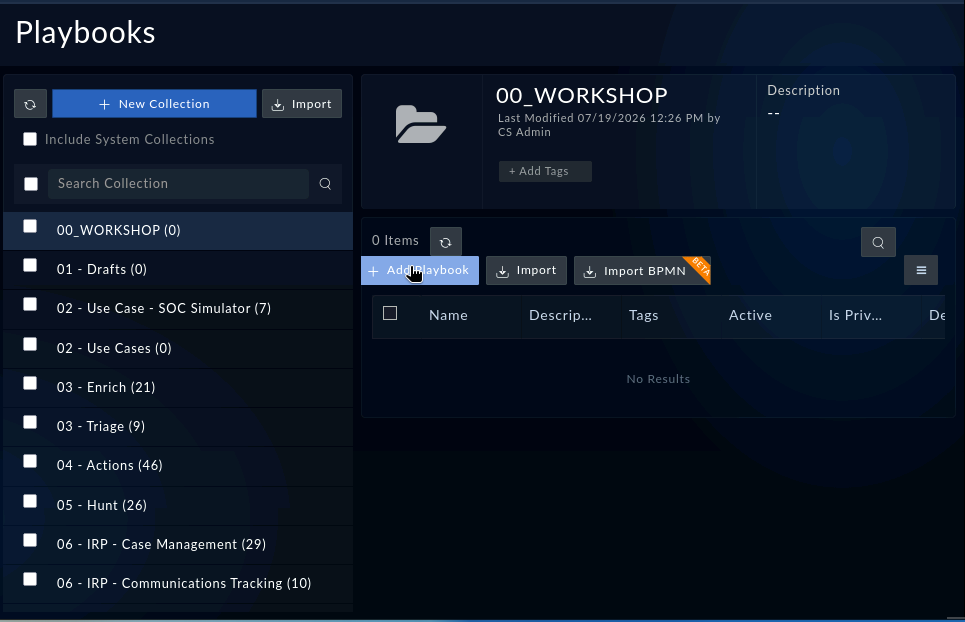
- Select the
00_WORKSHOPPlaybook Collection from the list of the left side. Then click on+ Add Playbook
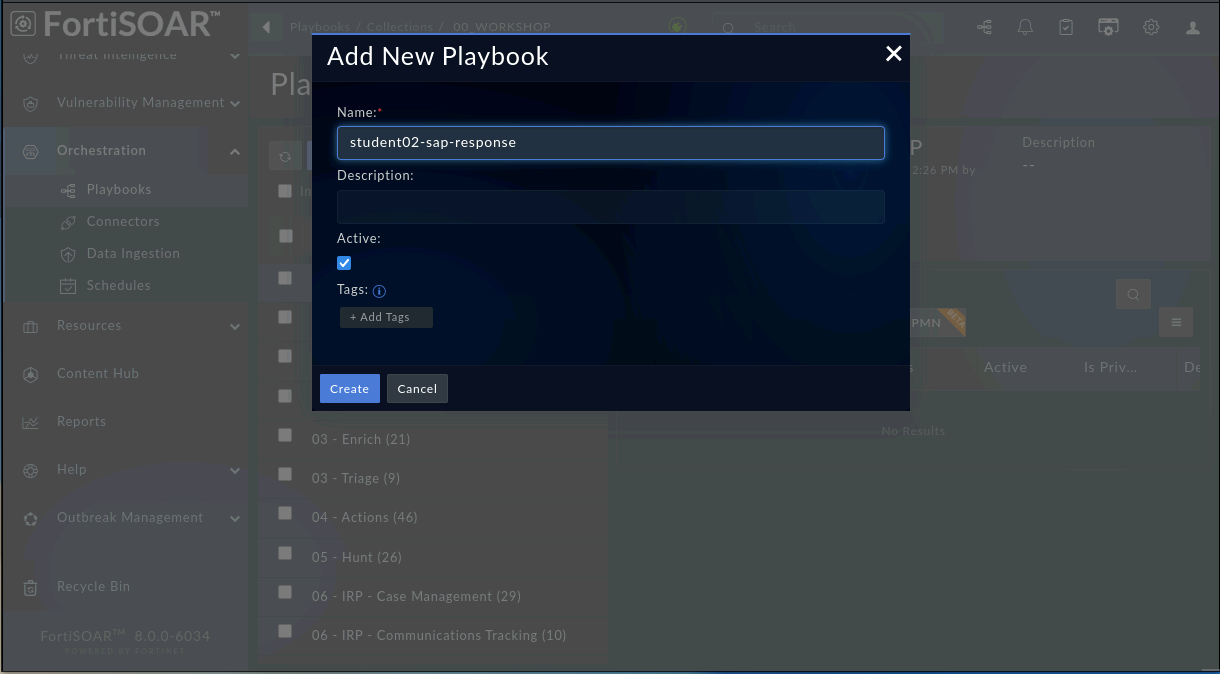
- Create a new playbook. Name it with your own student prefix, e.g.
student<N>-sap-response(replace<N>with your student number) - this convention applies to anything else you name in this lab too (any input variables, any saved records).
-
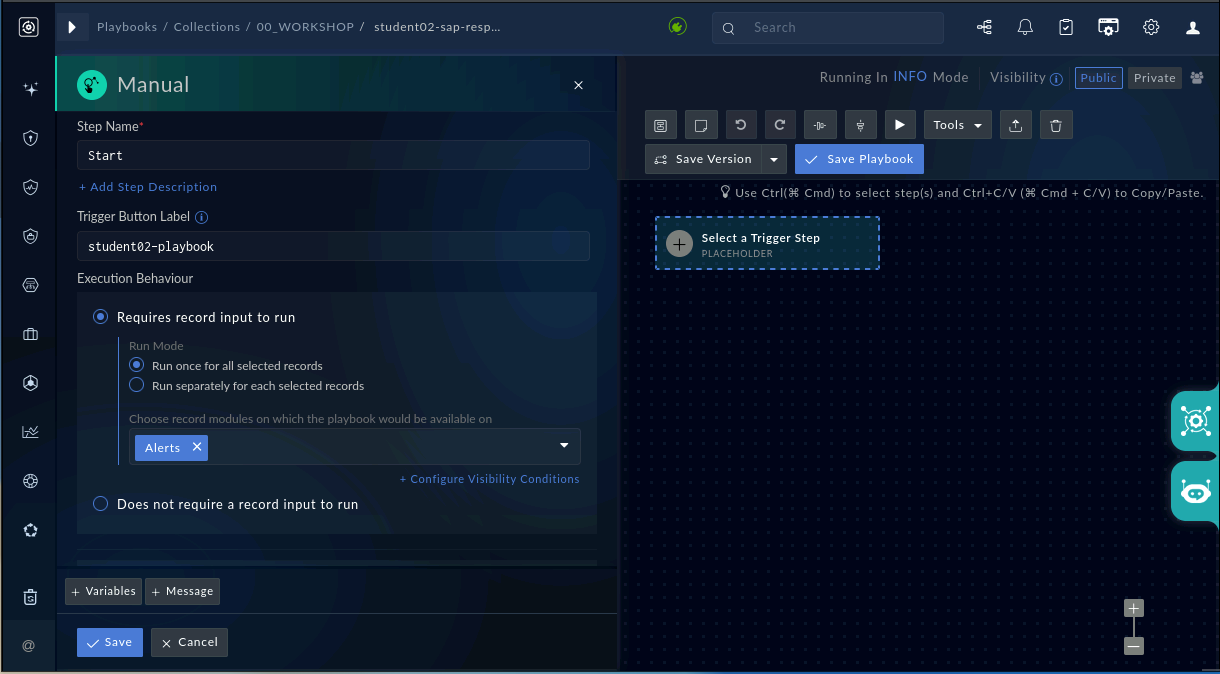
First we need to setup a trigger. In our case we will choose the
Manualone. Use the below values for the step:- Step Name:
Start - Trigger Button Label:
student<N>-playbook - Execution Behaviour:
Requires record input to run-Run onse for all selected record- Select Module:
Alerts
- Select Module:
Click on
Saveto complete the step setup - Step Name:
-
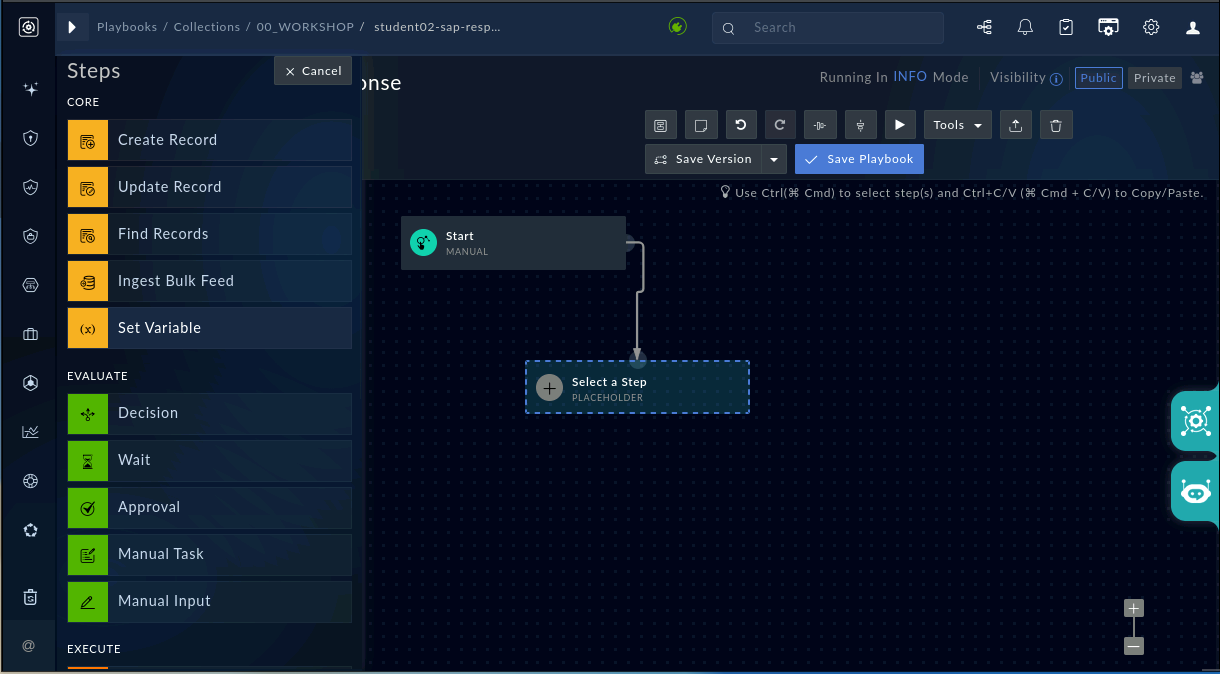
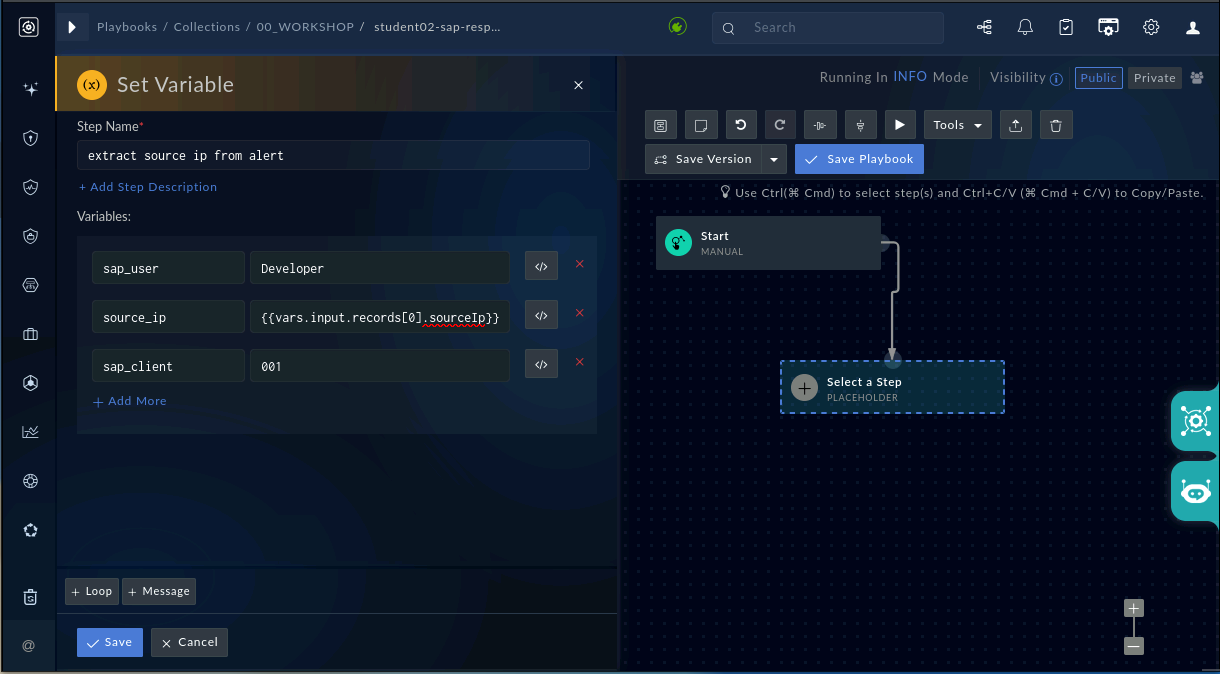
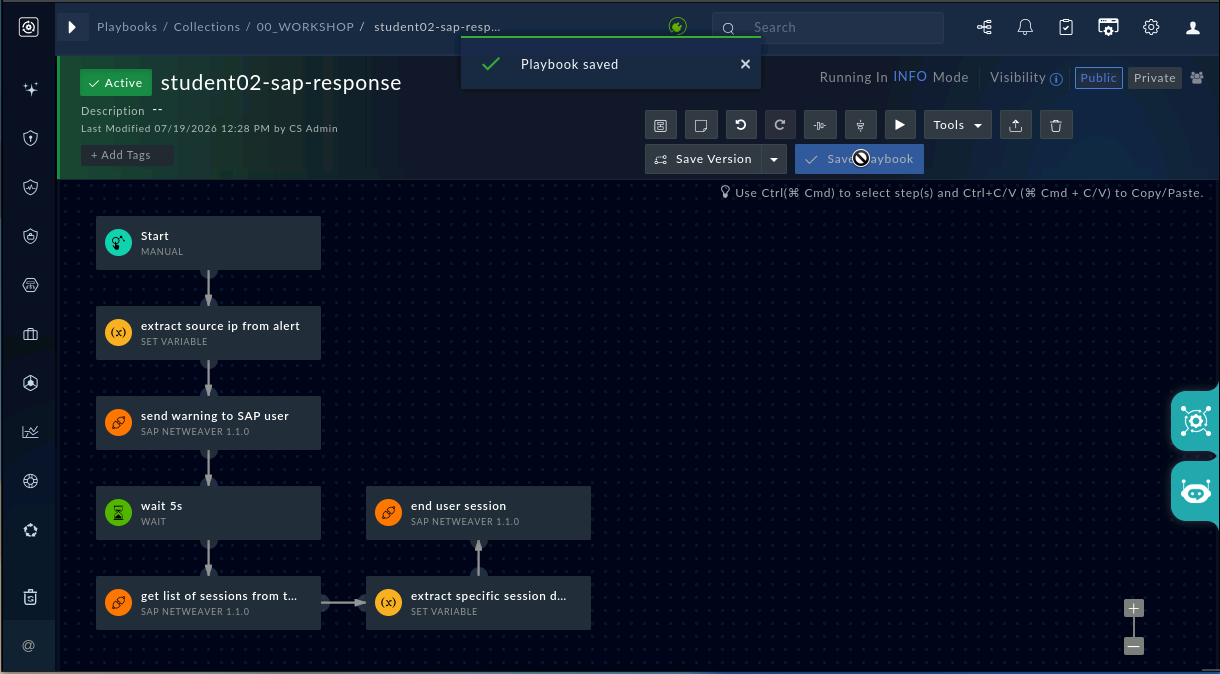
Next, we need to extract required information from the alert the playbook will be executed on like the source IP address, etc. In our case, we will also stage some information due to the limited time.
Create a new Step by click and drag the arrow anywhere on one of the 4 highlighted arrows around
Start. Then selectSet Variableas step.
-
Set the following values as provided below:
- Step Name:
extract source ip from alert - Variables:
sap_user:DEVELOPERsource_ip:{{vars.input.records[0].sourceIp}}sap_client:001
Then click on
Saveto store the step. - Step Name:
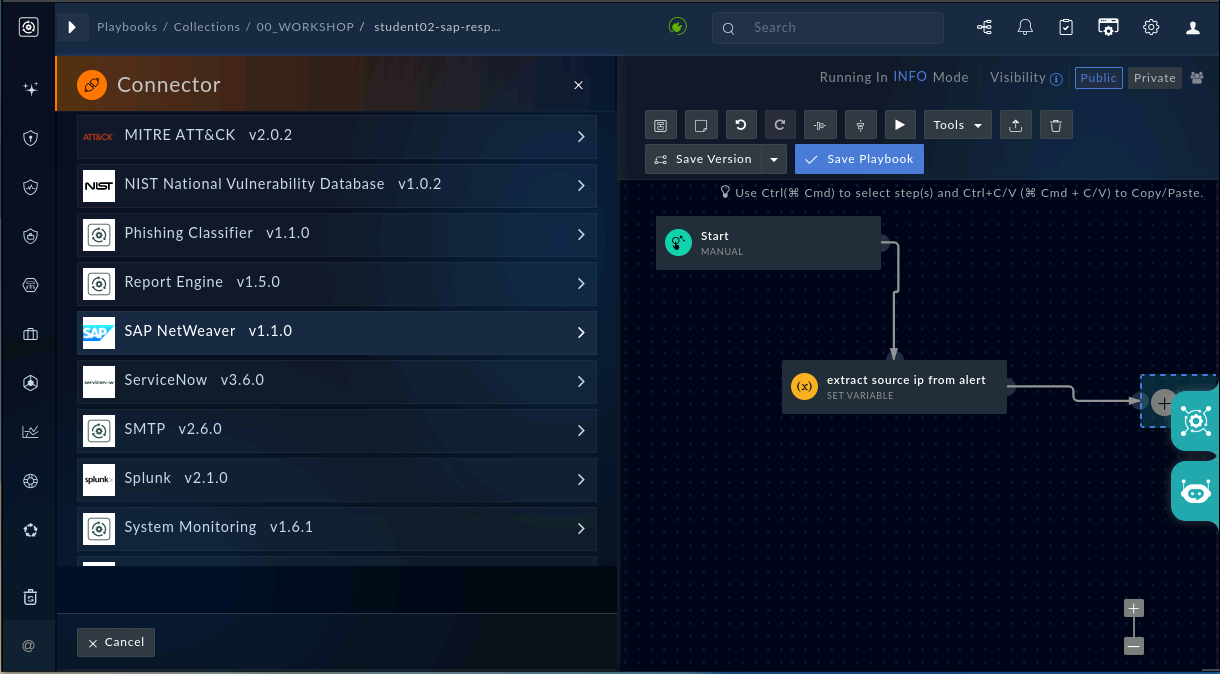
- Next, lets send the user a friendly warning by using the
SAP NetWeaverRFC Connector. Click and drop again the arrow somewhere in the workspace to create new step. This time, we will selectConnector-SAP NetWeaver v1.1.0
-
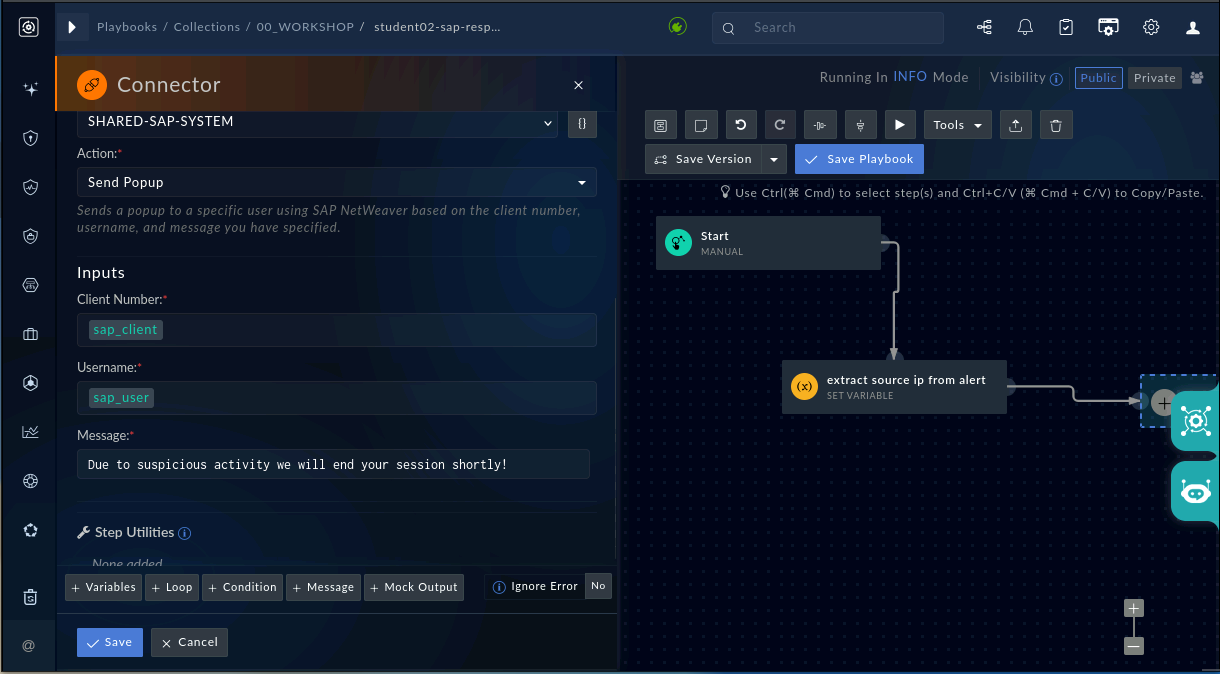
Set the following values as provided below:
- Step Name:
send warning to SAP user - Action:
Send Popup - Inputs:
- Client Number:
{{vars.sap_client}} - Username:
{{vars.sap_user}} - Message:
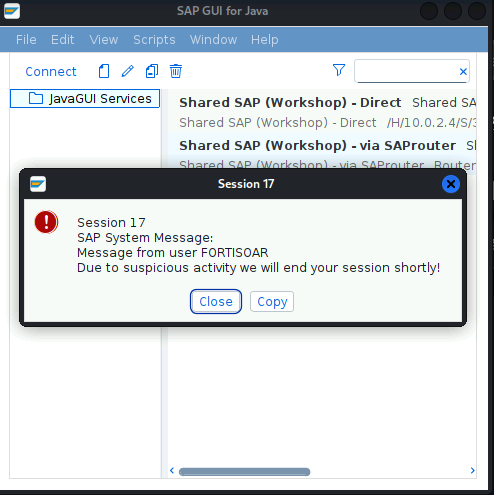
Due to suspicious activity we will end your session shortly!
- Client Number:
Then click on
Saveto store the step. - Step Name:
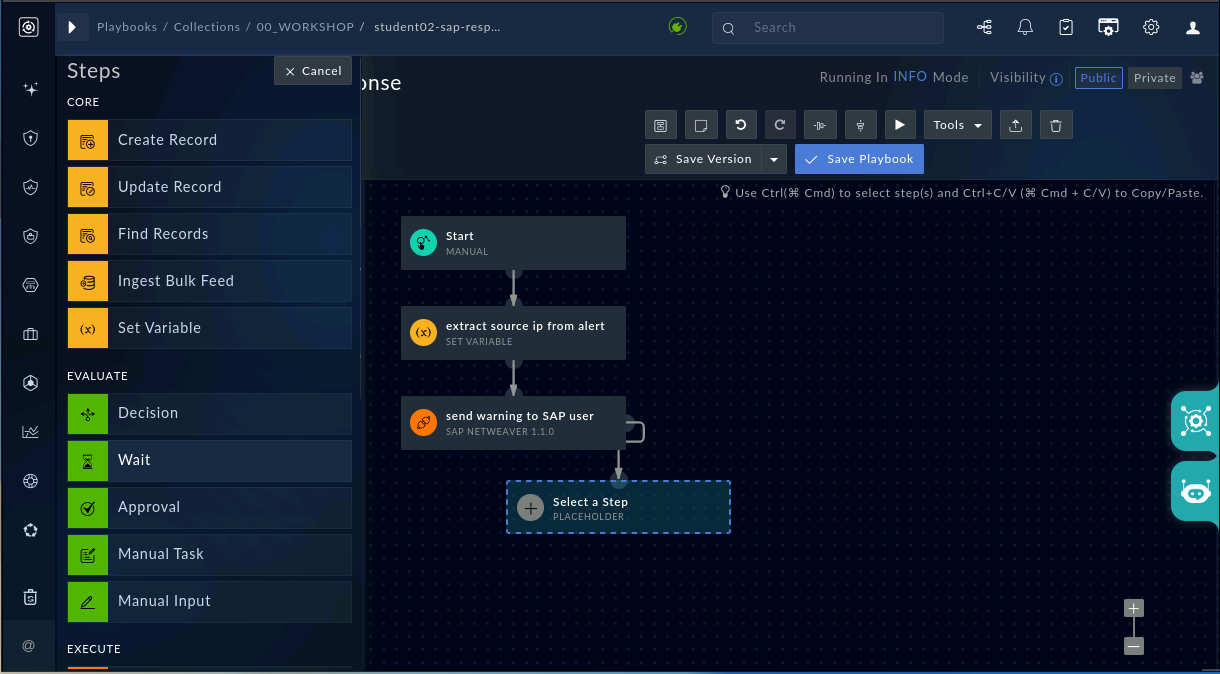
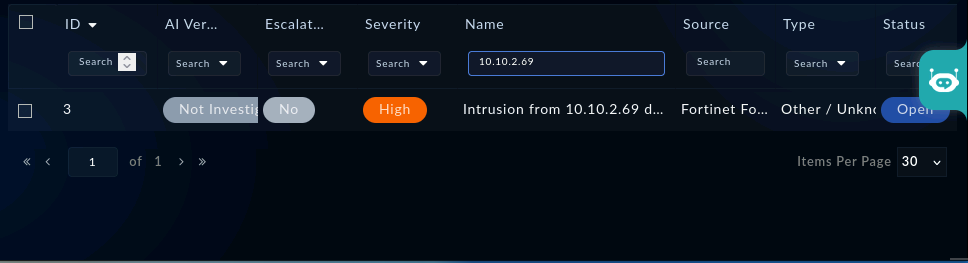
- After we have informed the user, let's wait for 5 seconds before we terminate the session. To do this, add another step (as in the previous tasks), this time select
Wait
-
Set the following values as provided below:
-
Step Name:
wait 5s - Choose wait type:
For Specified Time - Playbook will resume after
5s
Then click on Save to store the step
-
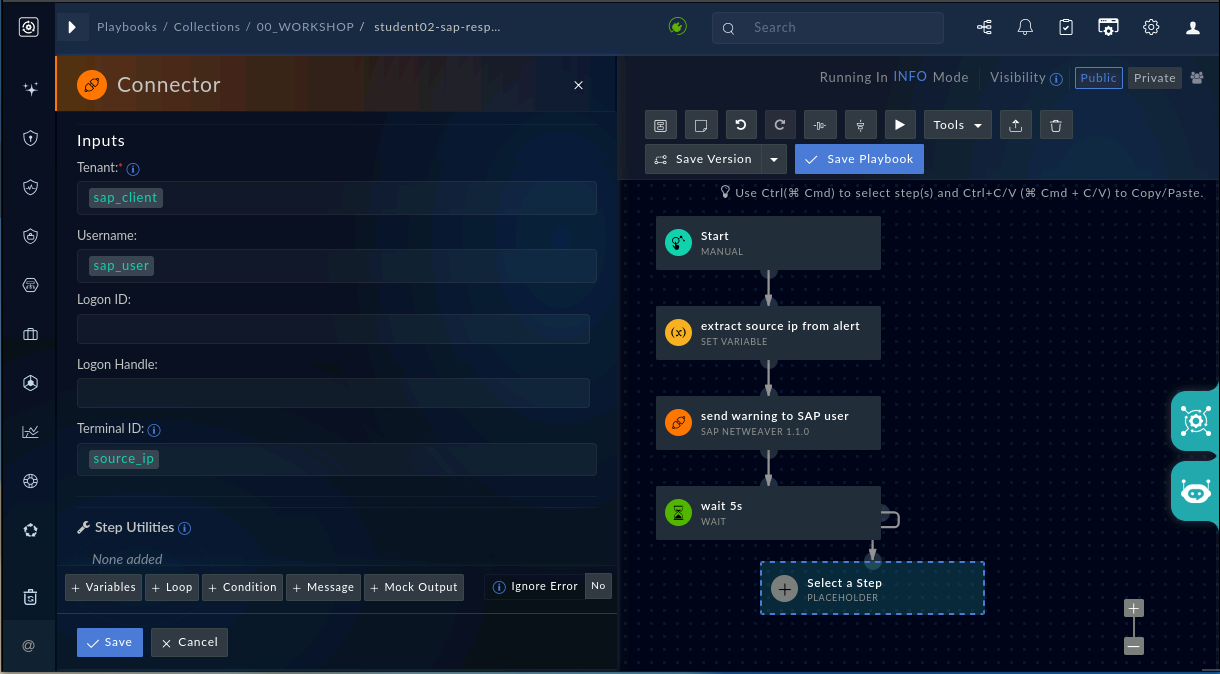
Now we need to extract the users session details to only end the session we own and not the others. Add a new step, this time we select again the
SAP NetWeaver v1.1.0Connector. Provide the values as described below: -
Step Name:
get list of sessions from the user - Action:
Get Session List - Inputs:
- Tenant:
{{vars.sap_client}} - Username:
{{vars.sap_user}} - Terminal ID:
{{vars.source_ip}}
- Tenant:
Then click on Save to store the step
-
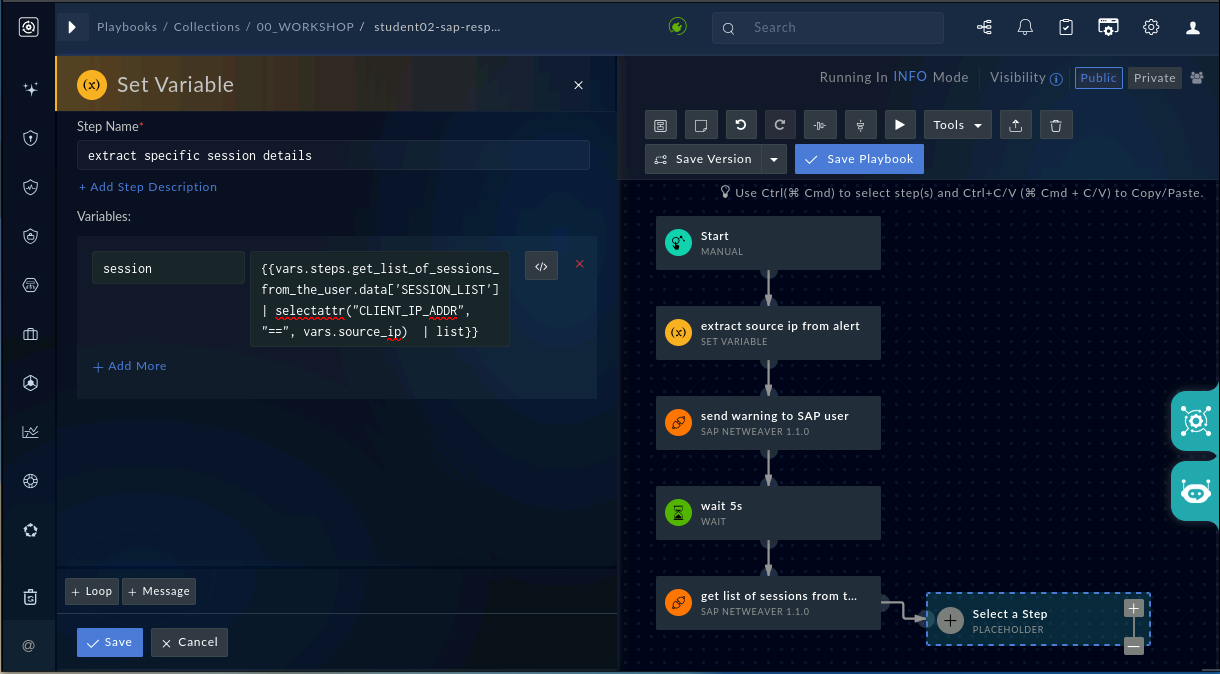
After getting the session details, we need extract some information like the
TIDand theLogon_HDL(Logon handle). For this we add a newSet Variablestep with the following values: -
Step Name:
extract specific session details - Variables:
session:{{vars.steps.get_list_of_sessions_from_the_user.data['SESSION_LIST'] | selectattr("CLIENT_IP_ADDR", "==", vars.source_ip) | list}}
Then click on Save to store the step.
-
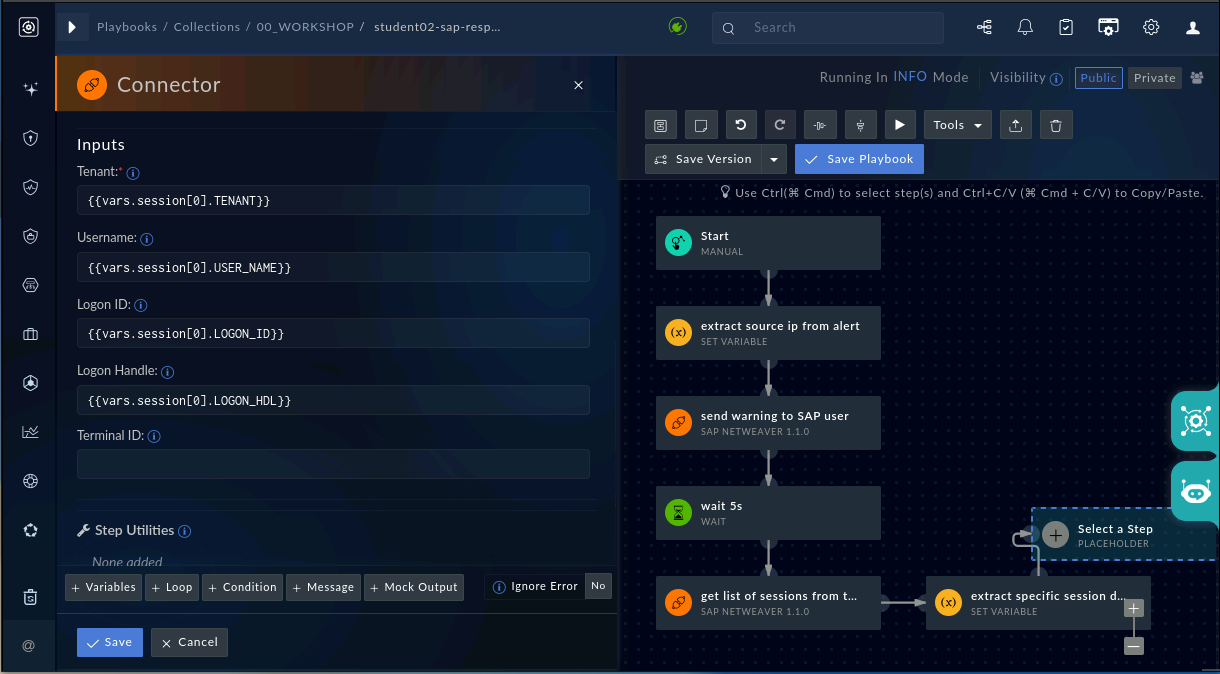
As a final step, let's terminate the users session. For this we add another step as before, this time we will use the
Connector-SAP NetWeaver v1.1.0again. Use the below values for the configuration. -
Step Name:
end user session - Action:
End User Session - Inputs:
- Tenant:
{{vars.session[0].TENANT}} - Username:
{{vars.session[0].USER_NAME}} - Logon ID:
{{vars.session[0].LOGON_ID}} - Logon Handle:
{{vars.session[0].LOGON_HDL}}
- Tenant:
Then click on ´Save` to store the step.
- Before we move on, click on
Save Playbookat the top right tools bar to save the whole playbook.
Execute the Incident Response Workflow
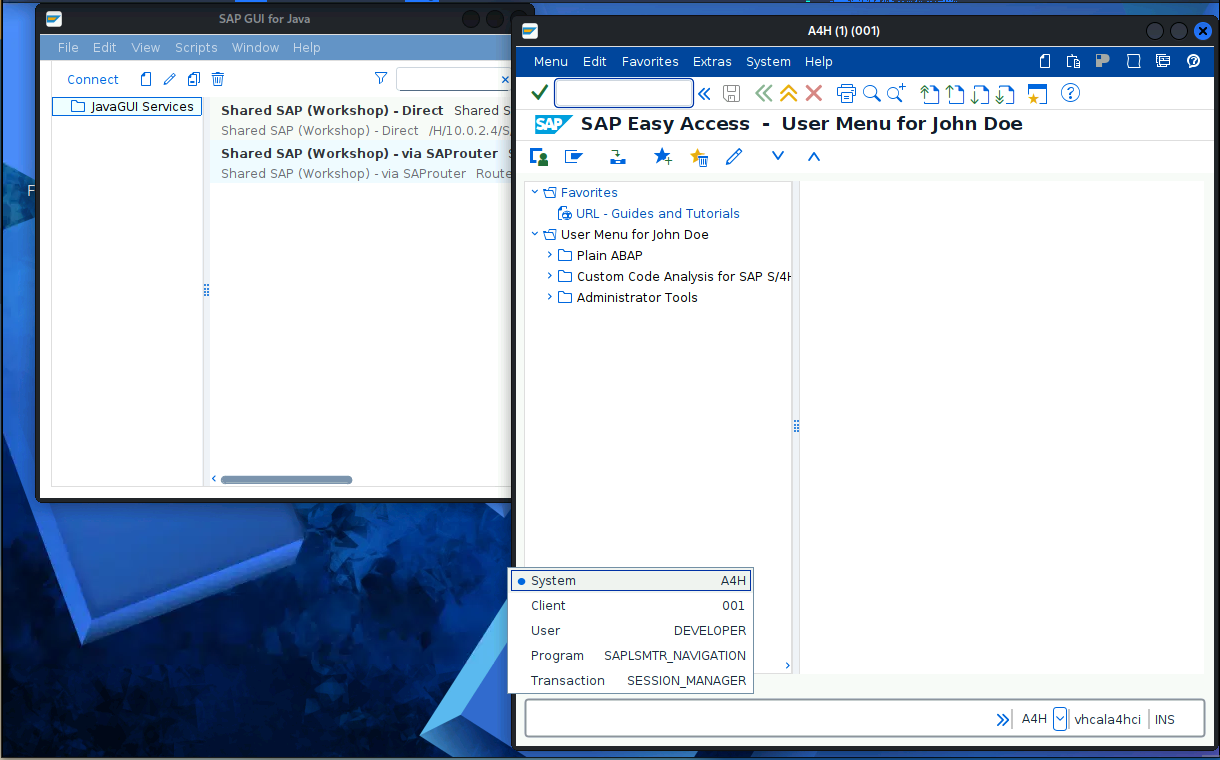
- To make sure we can see the result of our Playbook, make sure to be logged in to the Shared SAP system using the connection via the SAProuter and the user
Developer
- Back in FortiSOAR, switch back to the alert we have viewed previously (
Security Operations-Alerts; filter for your SAPRouter IP address)
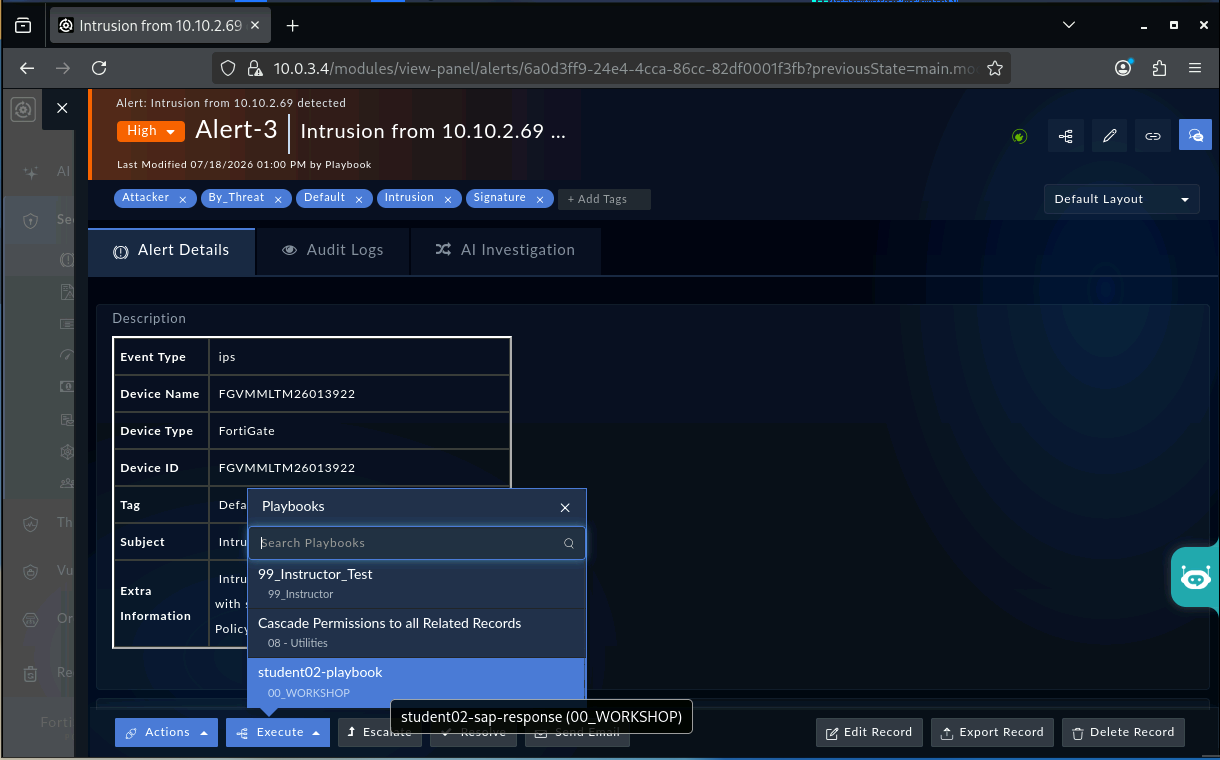
- At the bottom, click on
Executeand select the Playbook you have created from the list.
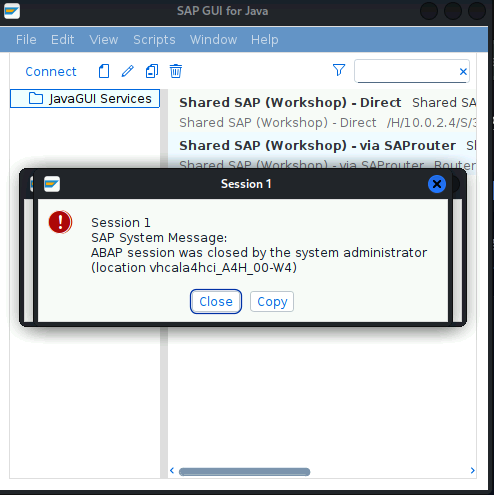
- Now monitor what happens with you SAP GUI session. First you will recieve a pop-up notification and shortly after that, your session will close.
Think before continuing
Which of these actions would you automate in a production environment?
- Notify the user
- Query active SAP sessions
- Terminate the SAP session
- Disable the SAP account
- Create or update an incident ticket
There is no single correct answer. The response should always reflect the customer's operational and business risk.
Wrap-up
Three things happened in this lab, in order:
- Detection produces events, not answers. A FortiGate block event became actionable only once something looked up what it actually meant for the SAP session behind it - the same log entry you'd have skimmed past in Lab 01's Forward Traffic view became the starting point for a real response here.
- Automation doesn't mean unattended. Every step in your playbook - the trigger, the lookup, the notification, the termination - fired because you built it and ran it against a specific record you had already identified as real. Nothing in this lab auto-fires against production data unattended; that's a deliberate design choice, not a limitation of the tooling.
- Scoped beats broad. The remediation action targeted exactly the session the lookup step found - not every session, not every user. A SOAR platform can automate a precise action just as easily as an imprecise one; which one it does is a design decision your playbook makes, not something the platform decides for you.
The point of this lab was not to teach you FortiSOAR administration. It was to show you what sits between "a firewall logged something" and "an SAP session actually got shut down" - and that a human decided every step of that path, even once it was automated.